Saturday, August 21, 2010

Slow posting, much?

So I forgot I had a camera haha It was packed away in my computer bag since I went back to college after spending winter break at home. But, now that it's time to move back into the dorms, I went through my computer case again and found it! Along with pictures! I forgot to take in-progress shots as I made these, but they're pretty straight forward projects.

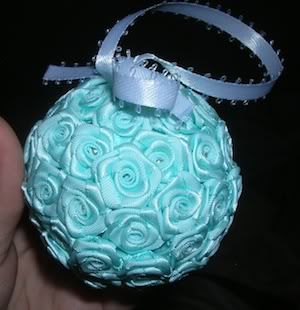
This is a rose ornament. I used small fabric roses, straight pins, Elmer's glue, a foam ball, and ribbon. Just stick the pins through the middle of the roses and put a bit of glue at the end. Stick it into the foam ball and keep repeating that process until the entire ball is covered. Then add your ribbon :)

Photobucket

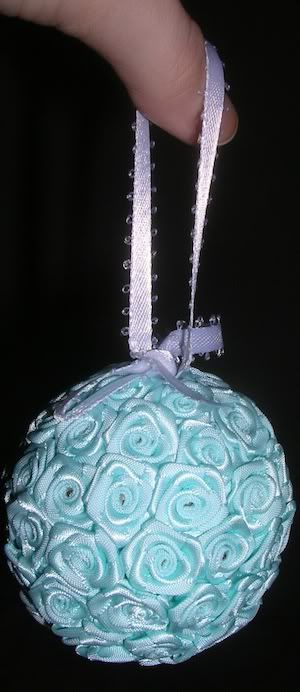
This is it hanging from my finger

Photobucket

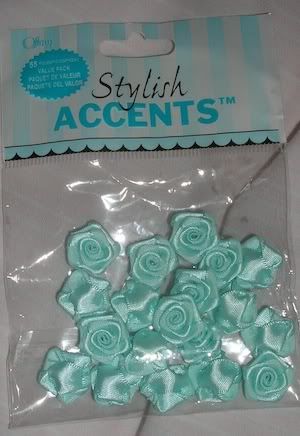
These are some left over fabric roses from this project

Photobucket


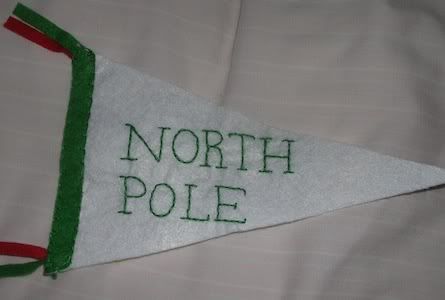
Here is a holiday/Christmas inspired decoration. It's just made of felt and stitched with craft thread.

Photobucket

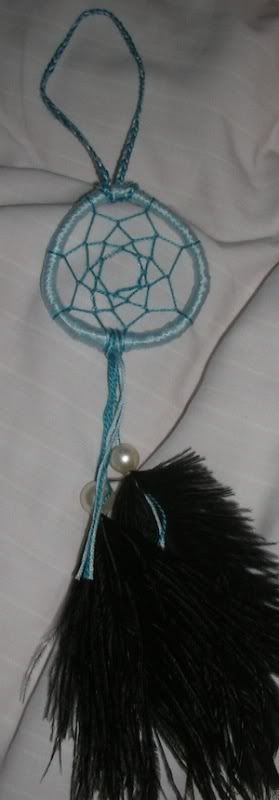
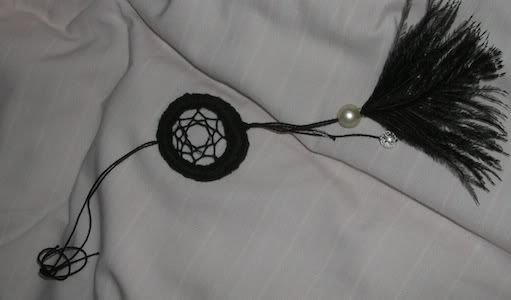
These are just some dream catchers I made. The blue one is for my sister for her birthday and the small black one is for my roommate. I made a matching one for myself :)

Photobucket

Photobucket

Thanks for reading... And looking haha :)

Friday, December 18, 2009

SNOWMAN!!!!

I was inspired to make this snowman from this post:


http://www.craftster.org/forum/index.php?topic=330034.0
(look at the second picture)


Now:  Materials you will need-


Two foam balls
Knife
Blue tissue paper
Elmer's Glue
Water
Sharpie
Orange landyard scrap string
Scissors
Straight pins
White Felt
White Ribbon
Paint brush
Glitter
Paper plate
Paper cup


1. Take the first foam ball and on one side cut (with your knife) off a very small portion of the circle, creating a flat edge. This will be used as a flat base to attach the second foam ball to.
2. Take the other side of the foam ball you already cut and cut off a larger portion of the ball to create another flat edge. This one will be the base with which the snowman will stand upon.
3. Now, take the second foam ball and repeat step one. JUST step one.
4. Now take the first foam ball you cut and put glue on the small cut. Attach the second foam ball. Now, you have this:

5. Once the glue dries, take a small paper cup and put in a bit of glue. Mix it with water. Make sure there is the same amount of glue as there is water. Make sure it's blended really well.
6. Take a piece of blue tissue paper and and start ripping off small pieces. Make a pile! :)
7. Take your paint brush and paint a small area of the top foam fall with the glue/water mix. Stick a piece of blue tissue paper on it and paint over that with the glue/water mix. Keep doing that. Now you have this:


8. Do that to the WHOLE structure


9. Now, once that is all dry, take your glue and put it on a little paper plate. Put lots of glitter on it. Mix it and make sure that there is A LOT of glitter in it.
10. Paint that glitter/glue mixture onto the bottom of the structure.


11. Once that is dry, cut a piece of white ribbon, long enough to wrap around the neck of the snowman and about an inch or so extra on each side. Pin it in place. (Picture to come)
12. Cut a strip of white felt, long enough to go from the middle of one end of the snowman head, over to the middle of the other send of the snow man head. (Picture to come). Pin each send in place
13. Cut two circles from the felt and glue over the pins. Let dry. (Picture to come)
14. Once dry, take your Sharpie and draw a face on it (Picture to come).
15. Take a pin and poke a small elongated hole between the eyes and the mouth, the same size as the short end of the lanyard scrap. Put the pin away.
16. Cut the lanyard scrap into almost a triangle. The long way.
17. Put glue over the whole you poked.
18. Stick the non-pointy side of the lanyard in the hole.

THE COMPLETED PRODUCT!


Monday, November 30, 2009

Dollar Tree Anyone?!

So, my boyfriend and I made a trip to the Dollar Tree and, of course, I stopped by the craft aisle!

I picked up this cute little wooden "LOVE" stand and some craft acrylics.

I don't have a picture of the "LOVE" without paint on it, but this is it after I covered it in red paint:


This is actually the back of the stand


And this is the front

That day I also made a trip to Victoria's Secret and since it's the holidays they have their normal pink tissue paper in the bad as well as one with stripes, this time it's pink and gold. My original plan for the stand was to paint "LOVE" in white and the base, along with the edges, in red.


But the paints I got were really crappy and the white didn't work, so I just painted it red. I decided to "Modge Podge" the tissue paper onto it. The only problem was I didn't have any Modge Podge so I took Elmer's and mixd it with water just to get the tissue paper to stay on there.


This is it with the "V" basically dry and the "L" is drying. Nothing else has tissue paper on it yet.

I also decided to have the "O" be the "odd man out" so I used the pink and gold striped tissue paper for that.

To finish it off, once I got all the tissue paper on, I just painted pure glue over it. Oh, and I applied the glue and the glue-water mixture with those stupid little brushes that come with those types of paint sets.


And it's DONE!


Friday, November 20, 2009

Gifts for Suitemates

I forgot to take pictures of the in-progress, but they're really easy to make!

First I got some holiday themed Hershey's Kisses :)


Then I calculate how many I'll actually need to make- 13.
9 for my suitemates, one for my boyfriend, and three more for some other friends I have at school.
Then I just made 13 piles of Hershey's Kisses, everyone got one green, on silver, and one red.

Now on to the actual wrapping!

I told a couple suitmates to save the toilet paper rolls for me to make these. Basically get as many toilet paper rolls as the number of gifts you want to make. Again, for me it was 13. Most people do this with tissue paper or something, but I like to keep gifts uniform with the wrapping, so I used this really pretty wrapping paper I've been using for gifts!


Then I took my toilet paper roll and added about 4 inches to the length, and one in to the circumference. I cut 13 pieces of the wrapping paper of the same size and I began to make them!

Since I forgot to take in-progress shots, I'll just... Make a fake one... Without a toilet paper roll because I don't have an extras haha

Now what you need:
Scissors
Wrapping paper, tissue paper, whatever you want to wrap your toilet paper roll with
Tape
Toilet paper rolls
Ribbon

Here is your toilet paper roll (But really it's scrap wrapping paper made into a cylinder with the back side facing up):


Now you take your piece of wrapping paper and wrap around, then tape it shut:


And now you take your ribbon and tie one side shut:
Don't forget to curl the ribbon!


Then you drop in the Hershey's Kisses, or whatever thing you choose to put in, and then seal the other side the exact same way!

Here is the REAL finished product!


And now you have HOLIDAY CRACKERS!

Sunday, November 15, 2009

Christmas Craft Swap!/Christmas in November!

So, my friend and I currently live on opposite sides of the country and we decided to do a Christmas craft swap! This is just a heads up as I can't post anything yet since I haven't even sent it to HER yet, but once she tells me she got it, I'll certainly be posting them! I'll also be posting what she made for me as long as it's alright with her!

Also, on November 7th, a couple of my friends invited me to this Christmas craft thing that their church group was putting on. It's called Christmas in November. They had some really cute ideas, one I'm even modifying a bit and giving them to my friends and suitemates at college. If you'd like for me to scan the pages just let me know! I'll take pictures of the little gifts I'm giving my friends and suitemates as soon as I get them done!

Wednesday, November 4, 2009

Just an FYI

I DO have a Facebook fan page, please check it out! CK's Crafting Through College <3

Friday, October 30, 2009

Christmas Ornaments!

I am fully aware that Halloween is tomorrow, but I just love Christmas too much!

I posted earlier that I was going to make some ornaments out of felt and foam balls. My original idea didn't work, which left me frustrated to no end. But then, I came across this post:
http://www.craftster.org/forum/index.php?topic=324730.0
The only real difference is that I didn't have ribbon like that, so I just cut felt to the size of her ribbon. Also, my foam balls were slightly smaller than hers- about a 2 cm difference. She has a tutorial up, but I'll post my own, for those who don't want to use ribbon or go to another site.


Materials:
Felt (or ribbon for the main body, whatever floats your boat)
Straight pins
Seed beads.
Ribbon to cover the line of pins in the middle, and for the hanging.
Charms or beads to pin onto the bottom.
Scissors
Ruler (makes things easier, trust me!)
Glue (I put glue on the bottom of each pin before I stuck it in the foam ball. You can if you want, but it works just fine without it)
Sequins

First, I chose my three colors to create my three layers. I pulled out some dark blue, light blue, and white felt. I cut those into 1 inch x 2 inch strips. 8 strips for the white (4 for each end), 16 for the light blue (8 for each end), and 16 for the dark blue (8 for each end).

Then, I chose a random spot on the ball and pinned the first triangle on it (see link for photos of how to do that. I didn't post the pictures I took of those because the light was so strong you couldn't see what I was doing!). When it came to placement, I wasn't as exact as carmenmarie but it worked out fine. By the way, sorry you can't really see what's happening in this picture. It's white felt on a white foam ball, so... yeah.


Once I got all four into place, I simply guestimated the placement of the corresponding four white felt triangles on the other side. I feel doing the same thing to each side in the order of the layers (doing white to both first, then light blue to both, etc.) was easier- much like Algebra.

Then I began to pin the light blue felt strips on. Measure down a little more than 1/4 inch down from the center of the first set of four white felts, and pin the first light blue in place. Pin the point on the line, to line it up. Keep doing that all the away around until all 8 are used. If that's hard to understand (I get it if it is) then refer back to the original link. She has some good photos of it.


Once again, I followed by doing the exact same thing to the other side. Now for the dark blue, they go in the same place as the light blue, just shifted down a little more than 1/4 inch. Both the blues are lined up.


The only thing I kind of had to figure out for myself (I didn't realize it at the time, but carmenmarie had some pictures of it) was that the corners of the last layer of blue kept poking out. It was really annoying and if I left it like that then once the ribbon came on it would be lumpy and gross. So I was pinning the corners over the previously done triangle. You can kind of see in my picture. If you go back to the link, pictures 5 and 6 show the pin work I'm talking about.

After all the felt went on, I took a straight pin and put a seed bead on it, then the sequin, and pinned it right in the middle of the white areas- in the very center.


It was after I put on all the felt and the sequins that I realized my ribbon wasn't thick enough. It just... didn't work. Then my boyfriend and I went into town and stopped at the local fabric store to pick up some ribbon. I landed on a white velvet ribbon with satin on the other side. I chose to have the satin side revealed. When you put the ribbon on, you have to pin it along the way, otherwise it will get lumpy and move around. I used every pin that is visible with a seed bead on it.

And last but not least, I put on another bead. When my parents sent up the felt, my mom included some sugar pearls as a surprise. I felt like the ornament seemed unfinished so I took a straight pin, put on a seed bead, and then a sugar pearl and stuck it right on the bottom.


I made this one for my parents, and one in red and white for my best friend's parents.

Here's the red one :)


Let me know what you think :)